

You should ALL know by now how important it is to have an email list and be actively working on building that list. To do this, you will need an email service provider. There are many options on the market. Some offer free plans, while other sport a heftier price tag.
Having used MailChimp when I first started blogging, I switched to ConvertKit* (affiliate) when I needed something with more functionality and automations. ConvertKit was made by bloggers for bloggers and so for me was an easy choice.
I’ve been using ConvertKit for around 5 years and I love it. I’m going to share with you everything you need to get started in this ConvertKit tutorial.
ConvertKit helps me run my blog by automating my email marketing tasks. Such as sending my welcome sequence, segmenting my list and sending opt in freebies and courses to people who have signed up.
Benefits of using ConvertKit:
- It will help you grow your email list.
- Deliver freebies to your audience. You can check out a video I made on creating freebies here.
- The automations mean you can touch certain tasks once and then forget about them while they run in the background.
- You can segment your email list, so you can send specific content to certain people.
- You can also create landing pages without expensive landing page software. Check out this video on creating a sales page.
- As of January 2020 they have a free tier for up to 1,000 subscribers.
What’s in this ConvertKit tutorial?
- What makes ConvertKit the best choice.
- How to set up your account.
- Explanation of the terminology.
- How to send a broadcast.
- Setting up a landing page.
- Setting up forms.
- Creating a sequence.
- Using forms and sequences together in automations.
- How to use tags and link triggers.
- Using Convertkit on your blog.
What makes ConvertKit the best option?
When you use ConvertKit all of your subscribers go into one master list, which you can segment and tag as you wish. This means you’re always working from a master list with no duplicates. However, you can still send certain content to people with certain interests via tagging and segmentation.
NOTE: This also means that you are only paying once per subscriber. Some other services duplicate subscribers when they opt in to multiple freebies and they are charged for again.
Why choose ConvertKit?
Here’s why I love ConvertKit:
- The founder Nathan Berry is a blogger, so he knows first hand exactly how bloggers want the software to behave.
- Although they’re not the most sophisticated, ConvertKit does offer landing pages, saving you money on landing page software.
- It’s easy to get freebies out to subscribers.
- I can send out courses on any timing delays I wish. ie. every day or one email wait 2 days another email etc.
- You can start building your list for free (up to 1,000 subscribers). Then it’s $29 a month (for up to 2000 subscribers).
- ConvertKit tracks how each subscriber joined your list and allows you to set up automations to tag them, add them to sequences and remove tags etc.
ConvertKit terminology
As with any technical programme there are some terms you might not be 100% clear on right at the start.
- Subscribers: Everyone who signs up for your list is a subscriber. You can import subscribers from a CSV file.
- Broadcasts: A one off single email.
- Forms: You can choose an opt-in form or a landing page. This is where the reader will put their email address to subscribe to your list/get their freebie.
- Sequence: An email series. A sequence can be created for a welcome series when someone first joins your list or you could deliver a course or challenge this way.
- Automations: The power of automations is huge! You can set rules which then work in the background without your input. For example, you can tag everyone that enters your welcome sequence and then automate removing that tag, so you know at any time how many are in the welcome sequence. This would be helpful if you wanted to exclude those in this sequence from a one off broadcast to ensure they don’t get too many emails. ConvertKit also offers visual automations. These can be so useful in seeing how your sequence/funnel will work.
Broadcasts
There are times when you want to just send a one-off email to your list. In this case you use a Broadcast.

You can schedule broadcasts or send them immediately. You can also split test the email subject lines. Enter two (enter one then click the B in A/B to get another subject line pop up) and Convertkit will send a small % to each subject line. Then depending on the open rates, it will continue to send the most opened subject line to the remainder of the subscribers.
Forms
ConvertKit allows you to capture email addresses through opt-in forms which you can embed on your website. Whether it’s on your homepage, blog sidebar, or at the end of a blog post.
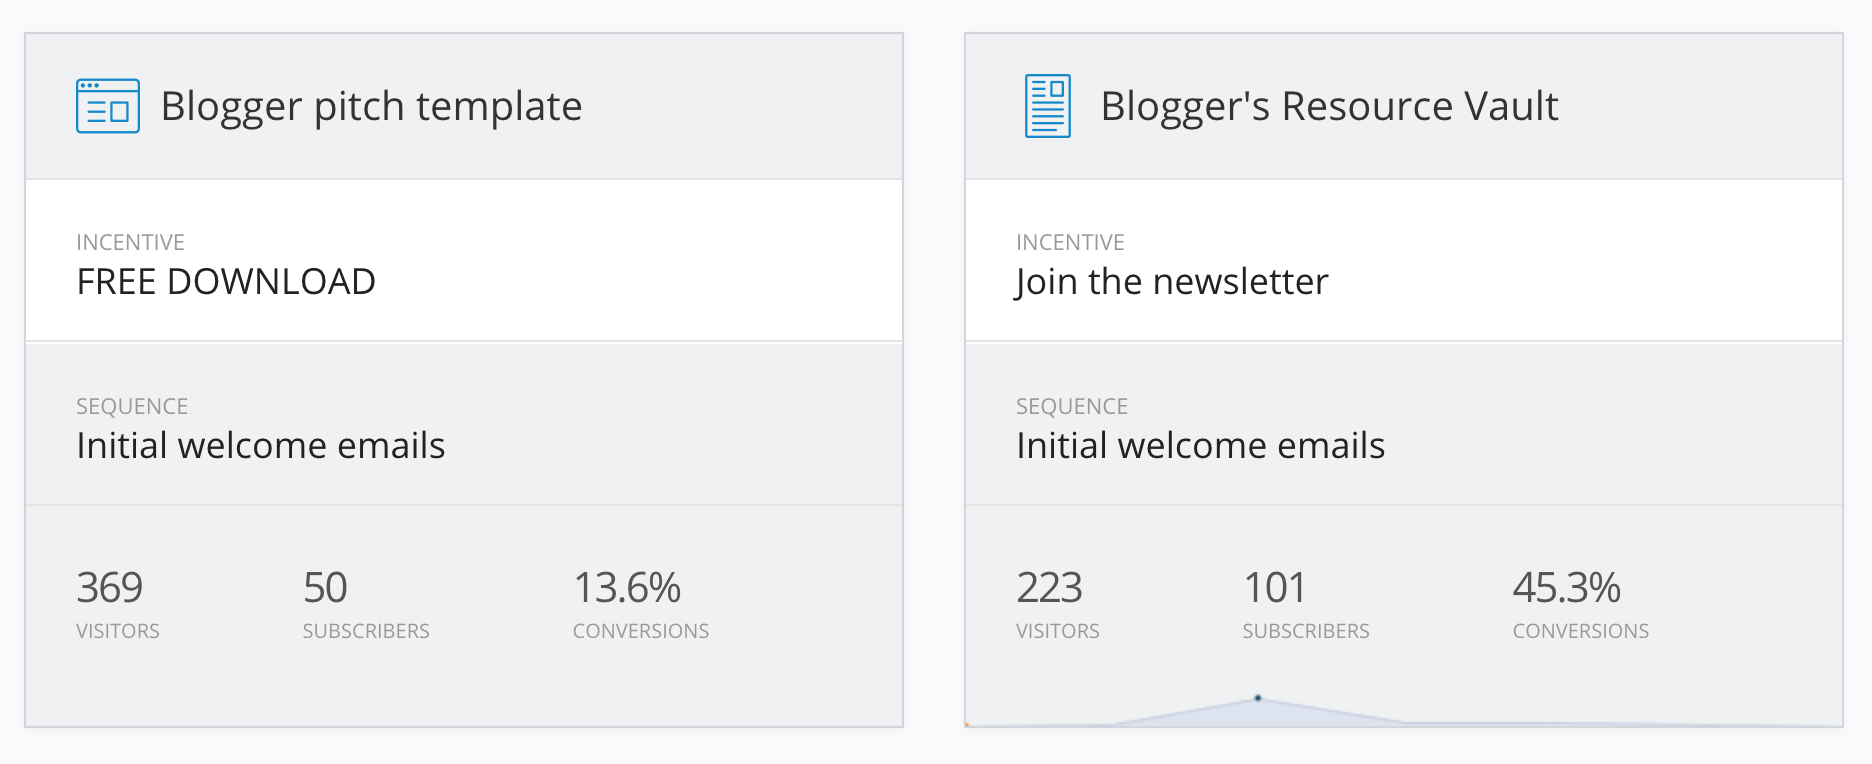
ConvertKit offer forms and landing pages. There are 4 form templates and 31 landing page templates.
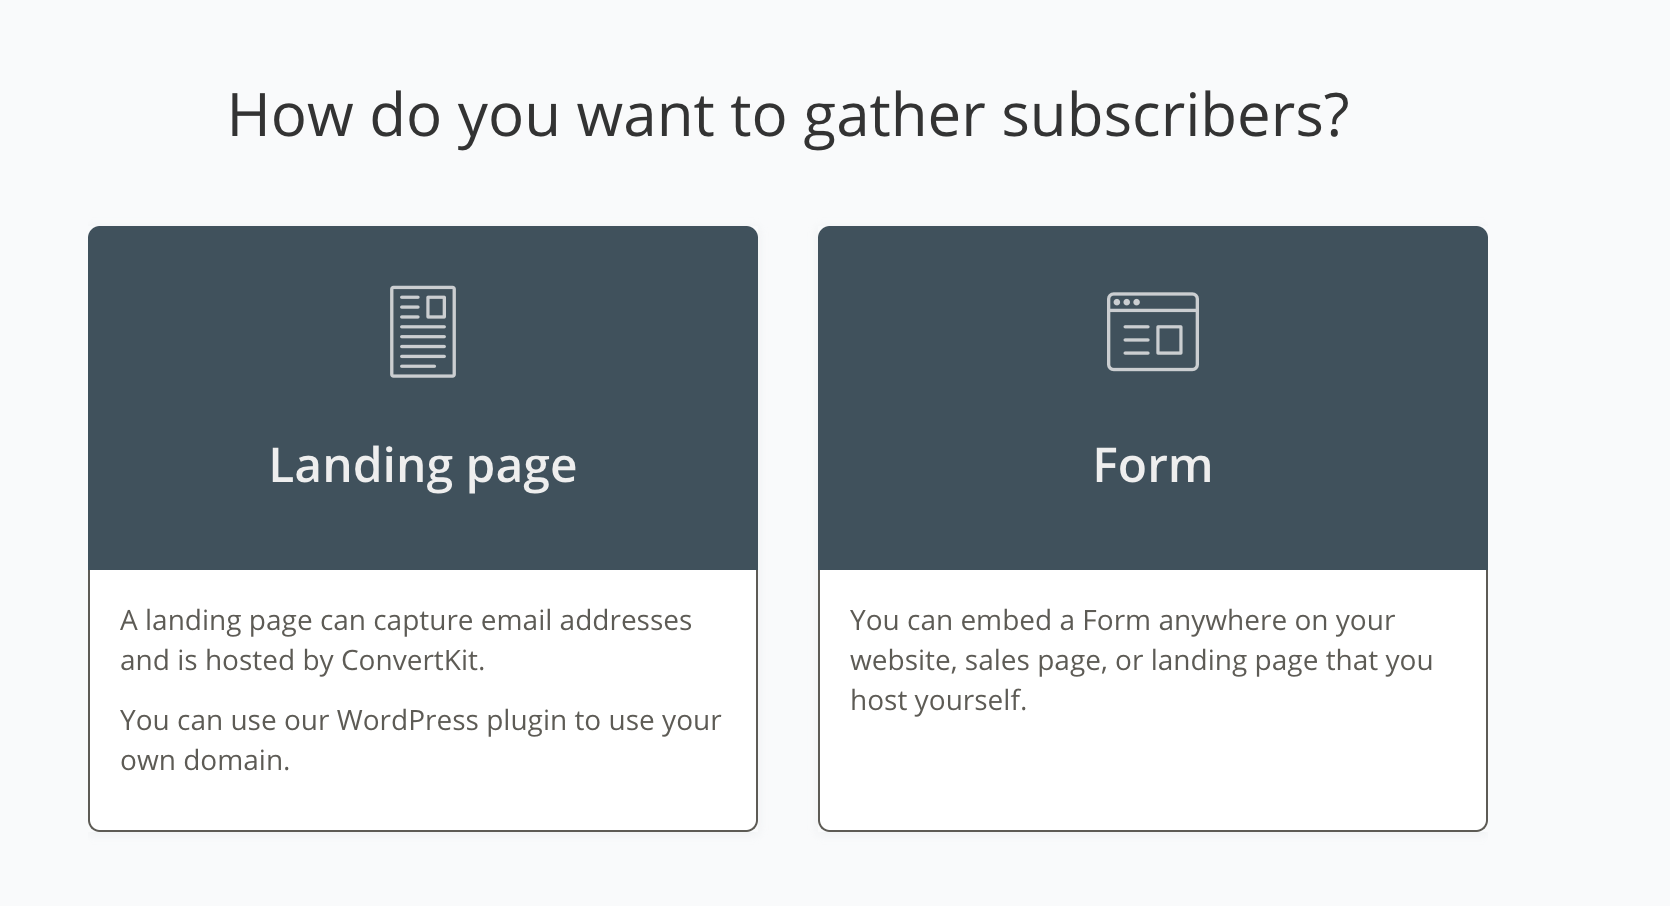
Here are the form options.
Here are the landing page options.

There are no limits to the number of different forms or landing pages you can create. You can click into the text lines to change them. You can also click the magic wand (top right corner) and pop in your own HEX codes to fully customise your form.

Sequences
We should all be using welcome sequences. Also setting up sequences as part of sales funnels if we have products. ConvertKit makes setting up these automated sequences really easy.

You can add as many emails you wish (by clicking the + Add email), with different sending delays and then move them around if you wish. You can choose the days/times they’re sent out and the Report tab will show you the individual open rates too. This means you can check which emails are performing best in a particular sequence. Make sure you change the drop down under status on each email to published or they won’t send.
Tags
Tags are very powerful and we can add them to subscribers based on specific criteria. You can tag them with interest groups, purchases or anything you wish. This means you can send out specific content to match their interests in the future.
Segments
Segments can contain subscribers matching any variety of criteria. A segment can include any combination of tags, forms, sequences or maybe even exclude certain subscribers.
How to set up your ConvertKit account
-
Enter you account details
After entering your details and confirming, wait until your account is approved. This won’t take too long, especially if their chat service is on and you message them through there. Then, you’ll be ready to get stuck in sending emails.

Make sure to set up your “From Name” up with your name/your brand. This is who will show up as the sender in the subscribers inbox.
-
Import your existing subscribers
If you already have an email list elsewhere, you should export the subscribers in a CSV file. You can then simply import them into your shiny new ConvertKit account. Click Subscribers – then Import subscribers, then drag your file over and select where you want them to go, i.e if they’re going into a sequence or being tagged. If you want to add a tag (maybe ‘list from Mailchimp’) you will need to set this up before you import your list. Or import your subscribers, then create a tag, then bulk add everyone on your list to that tag. This will only work accurately if you’re starting from scratch.

Click Import Subscribers and this box will then pop up.
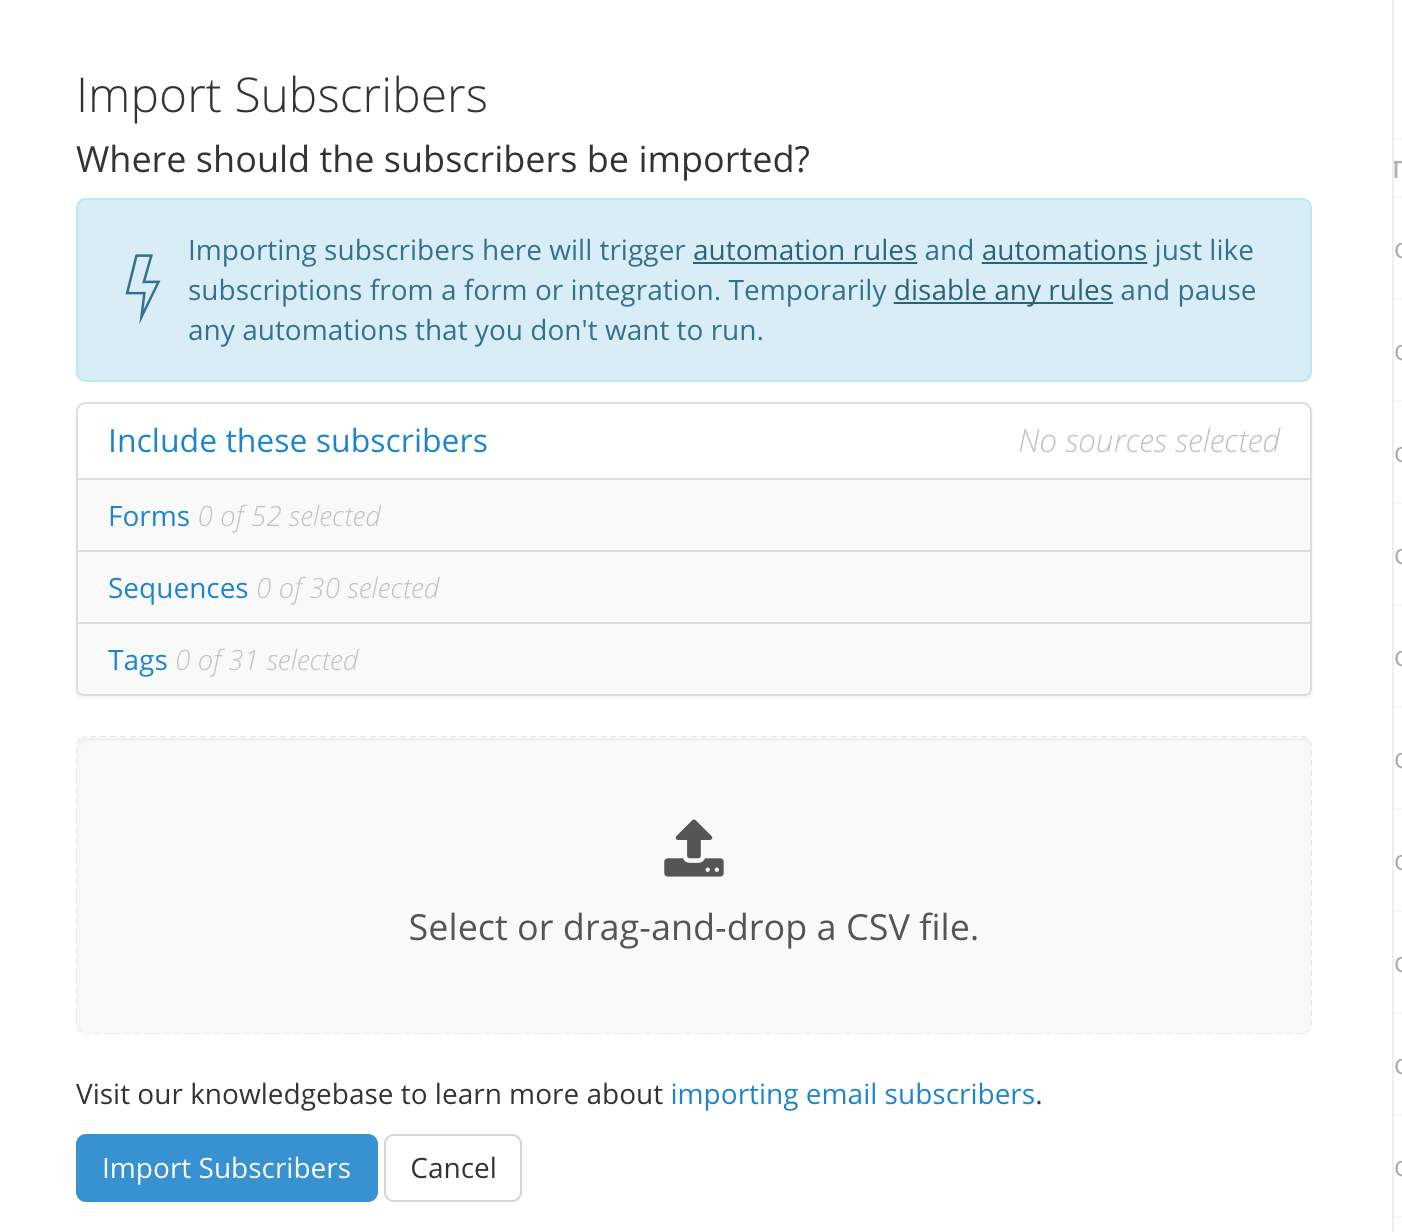
Make sure to import your subscribers into your newly created tag if you have created one. Map the columns in your CSV sheet to the correct fields inside ConvertKit. Just select the correct field from the drop down list and then click Import Subscribers button.
How to create a tag
Click on Subscribers on the top menu then scroll down and on the right hand side at the bottom you will see +Create tag. Click this and name your tag and save. Now you have your tag you need to use automations in order for these tags to be applied to subscribers going forward.
How to create a form
Let’s create a form! Click Form in the menu bar – then Create form – choice Form. Then select from the form options you are presented with. I often choose modal as I like to show a picture of the freebie next to the opt in box.
Now, you can amend and brand the template. You can change the accent colour, button colour and the text colour by clicking the magic wand and adding yours own HEX code or using the colour wheel.
Change the text on your button and create copy in the box that will drive opt ins. Then just save.
The Settings tab
Main Settings in the Form tab.
Choose a descriptive name for your form (no-one else will see it!). Now change the success message to something more specific to you. Remember your subscribers will see this message when they click to opt in. You need to encourage your subscribers to check their emails to confirm to get their freebie. This is a double-opt in; they need to be really clear they want to opt in before you can add them to your list. This prevents people adding other people to random email lists.
You can also direct your new subscribers to another page, such as a thank you page hosted on your website. You can also choose to add them straight into a particular sequence here too. When you’re all done click save!
How to send an opt in freebie
Click on the Incentive Email tab. Change the subject line text and the text in the message. I also change the subject line to something like ‘confirm to get your freebie!’. Then I explain a little more in the message box.

Select the incentive download, upload your freebie and click save. Then you can redirect your new subscribers to a thank you page if you wish.
Style
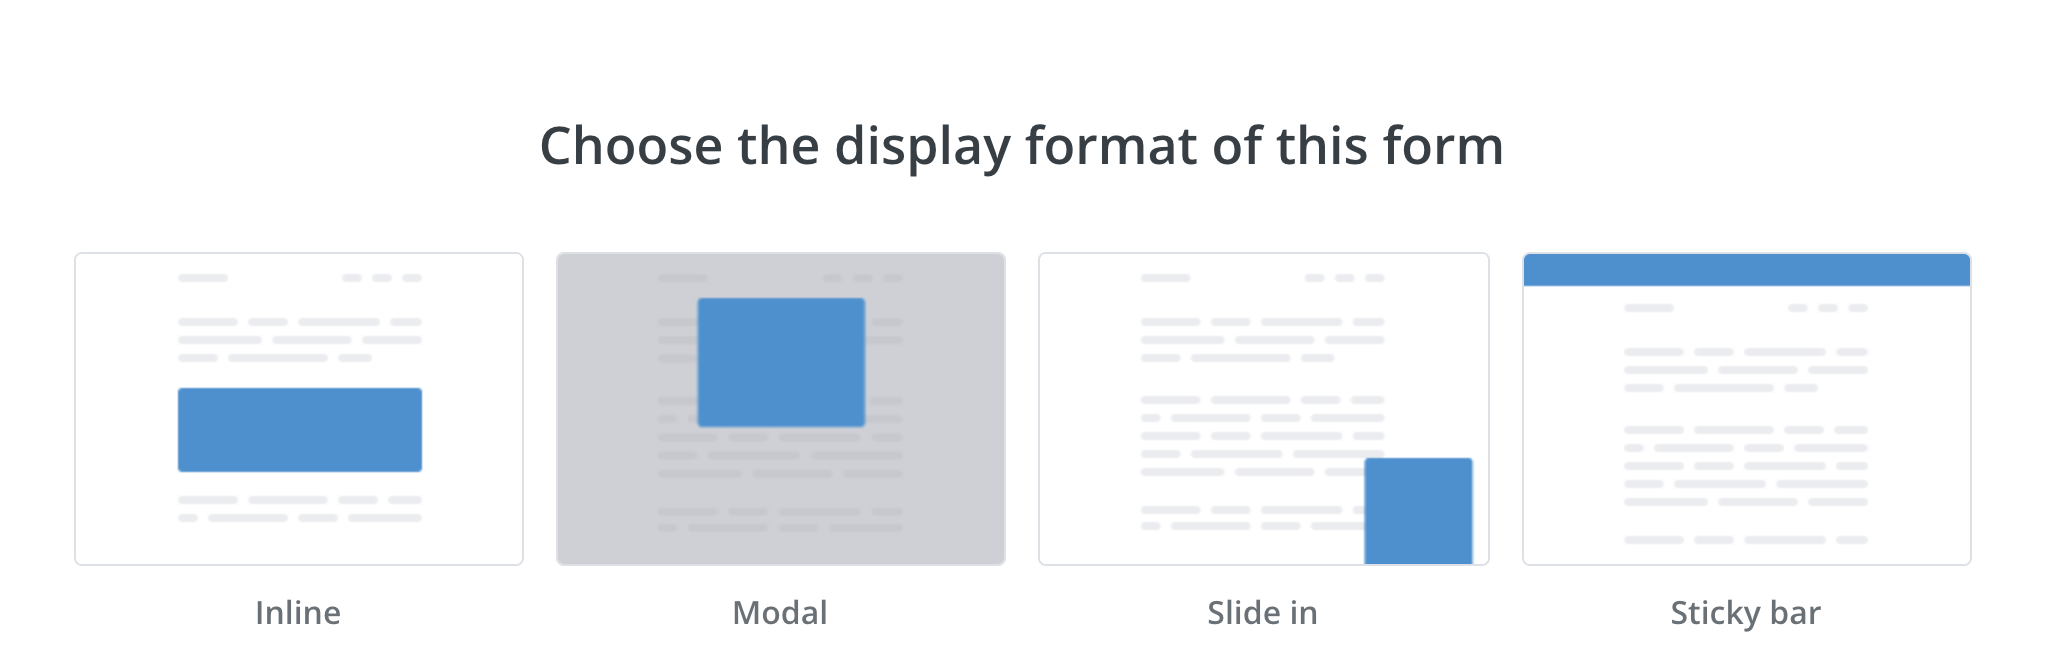
You can skip this section as you have already selected the type of form you want earlier. However, if you want to change you can and you can select how you want that form to be displayed from these option;
- Inline means you can insert it inside your content.
- Modal is a pop up.
- Slide in is the widget-style form that slides in once the reader begins to scroll.
- Sticky bar is a thin bar which stays at the top of the page.
You can then choose what you want to happen if someone has already subscribed.

Then click the Save Form button.
-
How to add the form to your blog

Finally, you’re ready to integrate your form onto your blog. Click the Embed tab in the settings options. There are three ways to embed your form onto your blog. Either by Javascript, Raw HTML or WordPress.
- Javascript – You can copy and paste the Javascript code wherever you want the form to appear. Javascript is shorter than Raw HTML, so can be faster. You can change the form without changing the javascript in the post.
- Raw HTML – The second option you can choose from is html. Copy and paste this code into the text view exactly where you want the form to show. If you want to make any changes you will have to re-embed the form again for the changes to show up.
- WordPress – You could use the ConvertKit WordPress plugin; you can download here. Then use the short codes and paste them into the post.
- If you have the plugin you will see a drop down box under your post, so you can just select the relevant opt in from here without having to have the code.
Creating a landing page in ConvertKit
- Choose which template you want to use from the options.
- Then on the Content tab you can make amendments just as we did in the form section.

- Title your landing page, again only you will see this.
- Click the “View” button to see how your form looks.
- In settings you can make the same amendments that we did for the form.
Other Options
This is where you can duplicate and delete your landing page, or archive it if you don’t want to get rid of it completely.
Creating Segments in Convertkit
Segments in ConvertKit are used to include or exclude certain subscribers from any forms, tags, sequences or other segments.
Click on “Subscribers” and then click “Create a Segment” in the right sidebar. A pop up like this will appear.

Under “Select Your Subscribers”, you’ll see “Matching any of the following”. You now have the option to choose between “any”, “all”, or “none”.
• Any: If you want a segment containing people in a few different categories then you can add the categories and use this ‘any’ option.
• All: If you want people who are in multiple categories, use ‘all’ to select the people in all the categories selected.
• None: You can exclude people from a segment using none option.
When selecting your filter, you can choose from several options: All subscribers, Cold subscribers, Subscribed to, Within segment, or Date.

Then choose what subscribers are subscribed to: Forms, Sequences, or Tags. You can add as many filters as you want to build your super customised segment.
Using automations in ConvertKit
This is part of the genius of ConvertKit and even more so now this process is very visual. You can build the visual path that you want your subscribers to go through. Then click each part and add the text of your email.

Automations allow you to:
• Tag people who signed up to a particular form
• Untag people when they finish a sequence
• Create a trigger, so that when one ‘event’ happens, an action then occurs.
• Add subscribers to a specific sequence at a specific point.
Link Triggers
You can also use automations to help you research and gather information about your subscribers. Simply ask them a multiple choice question and use link triggers as the answers. This means that when they click their answer the automation will add a particular tag to them.
You could then set up further automations, for example, if someone clicked the first answer they then could be added to a particular sequence.
Don’t forget to get an automated sequence up and running you will need to create the form, the sequence and then add the automation.
Cleaning up your subscribers in ConvertKit
As you pay based on the numbers of subscribers you have it’s a good idea to clean up your list every so often. You don’t want to be paying for disengaged subscribers. If they don’t open or engage then get rid of them!

First, in the Subscribers tab create a tag called cold subs or clean up + maybe the date. Then change the drop down to cold. Click to select all the people on the list. You will have to do this a page at a time if you have lots. Then select bulk actions, Tag and add the tag you want them to have.
Then you can send a email just to these people to see if they wish to remain on your list. Pop a link trigger in the email for those who want to leave which tags them with ‘To remove’. Then at certain points delete those subscribers with that tag.
Conclusion
That’s it ConvertKit in a 2.6k word nutshell! ConverKit is super easy and actually intuitive. If you want to sign up for ConvertKit you can use this link. Do you have any tips or questions about getting started with ConvertKit, please comment below.
Want to refer to this later? Why not pin it!

Disclosure: This post contains affiliate links. By clicking on the links and purchasing something, I will earn a small commission. This helps me deliver great content for free.
Comments 6
This is very useful thank you. It’s great that you can segment subscribers to target particular groups with things that will be of particular interest to them #thelistlinky
This has me convinced I need to switch to ConvertKit. I use MailChimp at the moment but it’s pretty limited compared to what you can do with this. I may leave it until end of the year when my salary starts up again though. This is an awesome post, am definitely going to refer back. X #thelistlinky
Author
Ah thanks, so glad it helped x
Good write up, very useful!
I have started using Converkit right from the beginning as I build my list, because I heard good things about it and it is a pain to switch from something else like Mailchimp.
Thank you SO much for creating this awesome tutorial — it’s something I’ll be referring back to a lot!
This came at a perfect time. I’ve been contemplating moving from MailChimp to convert kit for a while. This post is so informative and helpful and I think I will give it a go. I will keep you posted and thank you so much.