

There’s so much tech surrounding being a blogger/entrepreneur that sometimes it can be overwhelming. Some of the apps and programmes quite literally save my life (and my sanity) like the king of all Twitter schedulers, Social Oomph* and so many other ‘tech bits’ that we just seem to ‘collect’ as we go through our journey. Some of these are as cheap as a weekly Starbucks, while others are more of a sizeable investment.
One type of software which always seems out of my reach is Webinar software. If it’s a specialist software it’s likely that it will start around $39 per month and you will be limited to 100 attendees. If like me, you get 350 people sign up for your first webinar then you’ll be looking at nearer $100 per month, which is a substantial investment when you’re just starting out in webinars.
Faced with this and not wanting to spend my daughter’s inheritance, I decided to create my own webinar platform using YouTube Live, WordPress and a third party chat box. All of which are FREE!
Here’s how I did it
Set up a new page in WordPress – name it the same as your webinar. If you have the option to remove the header and footer to the page then it’s a good idea to do so. This limits the distractions your attendees will face when watching your webinar.

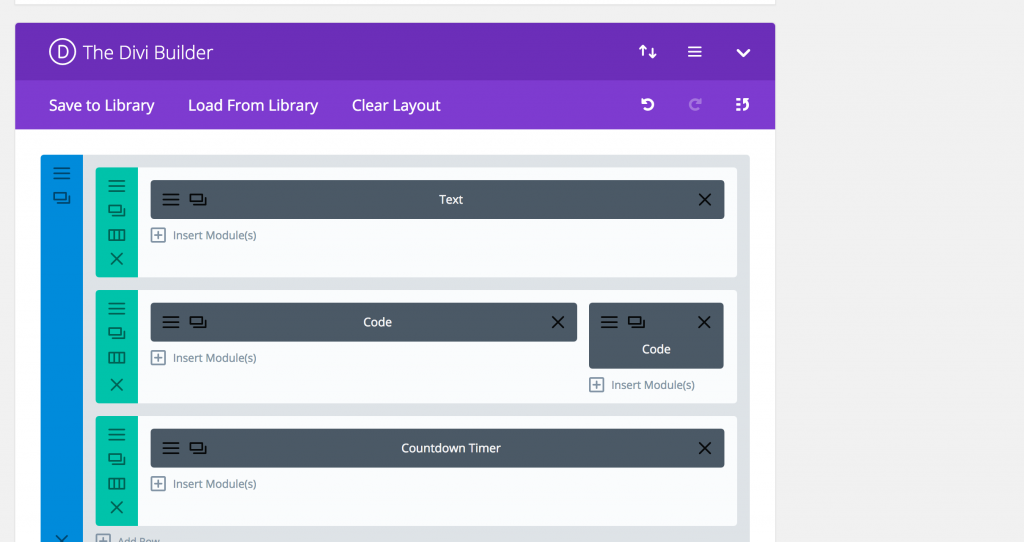
This is how I laid out the page in the Divi WordPress theme. Don’t worry if you haven’t got Divi, you will just add the code in the text screen.
- Then go to your Creator Studio on Youtube. On the left-hand side go to Live Streaming, click it, then click Events.

- Then go to Schedule a new event or + New Live event (in top right) and click.

- Complete the details here – Webinar name, the date and time, complete your tags and leave the rest as it is. Then click ‘create event’.
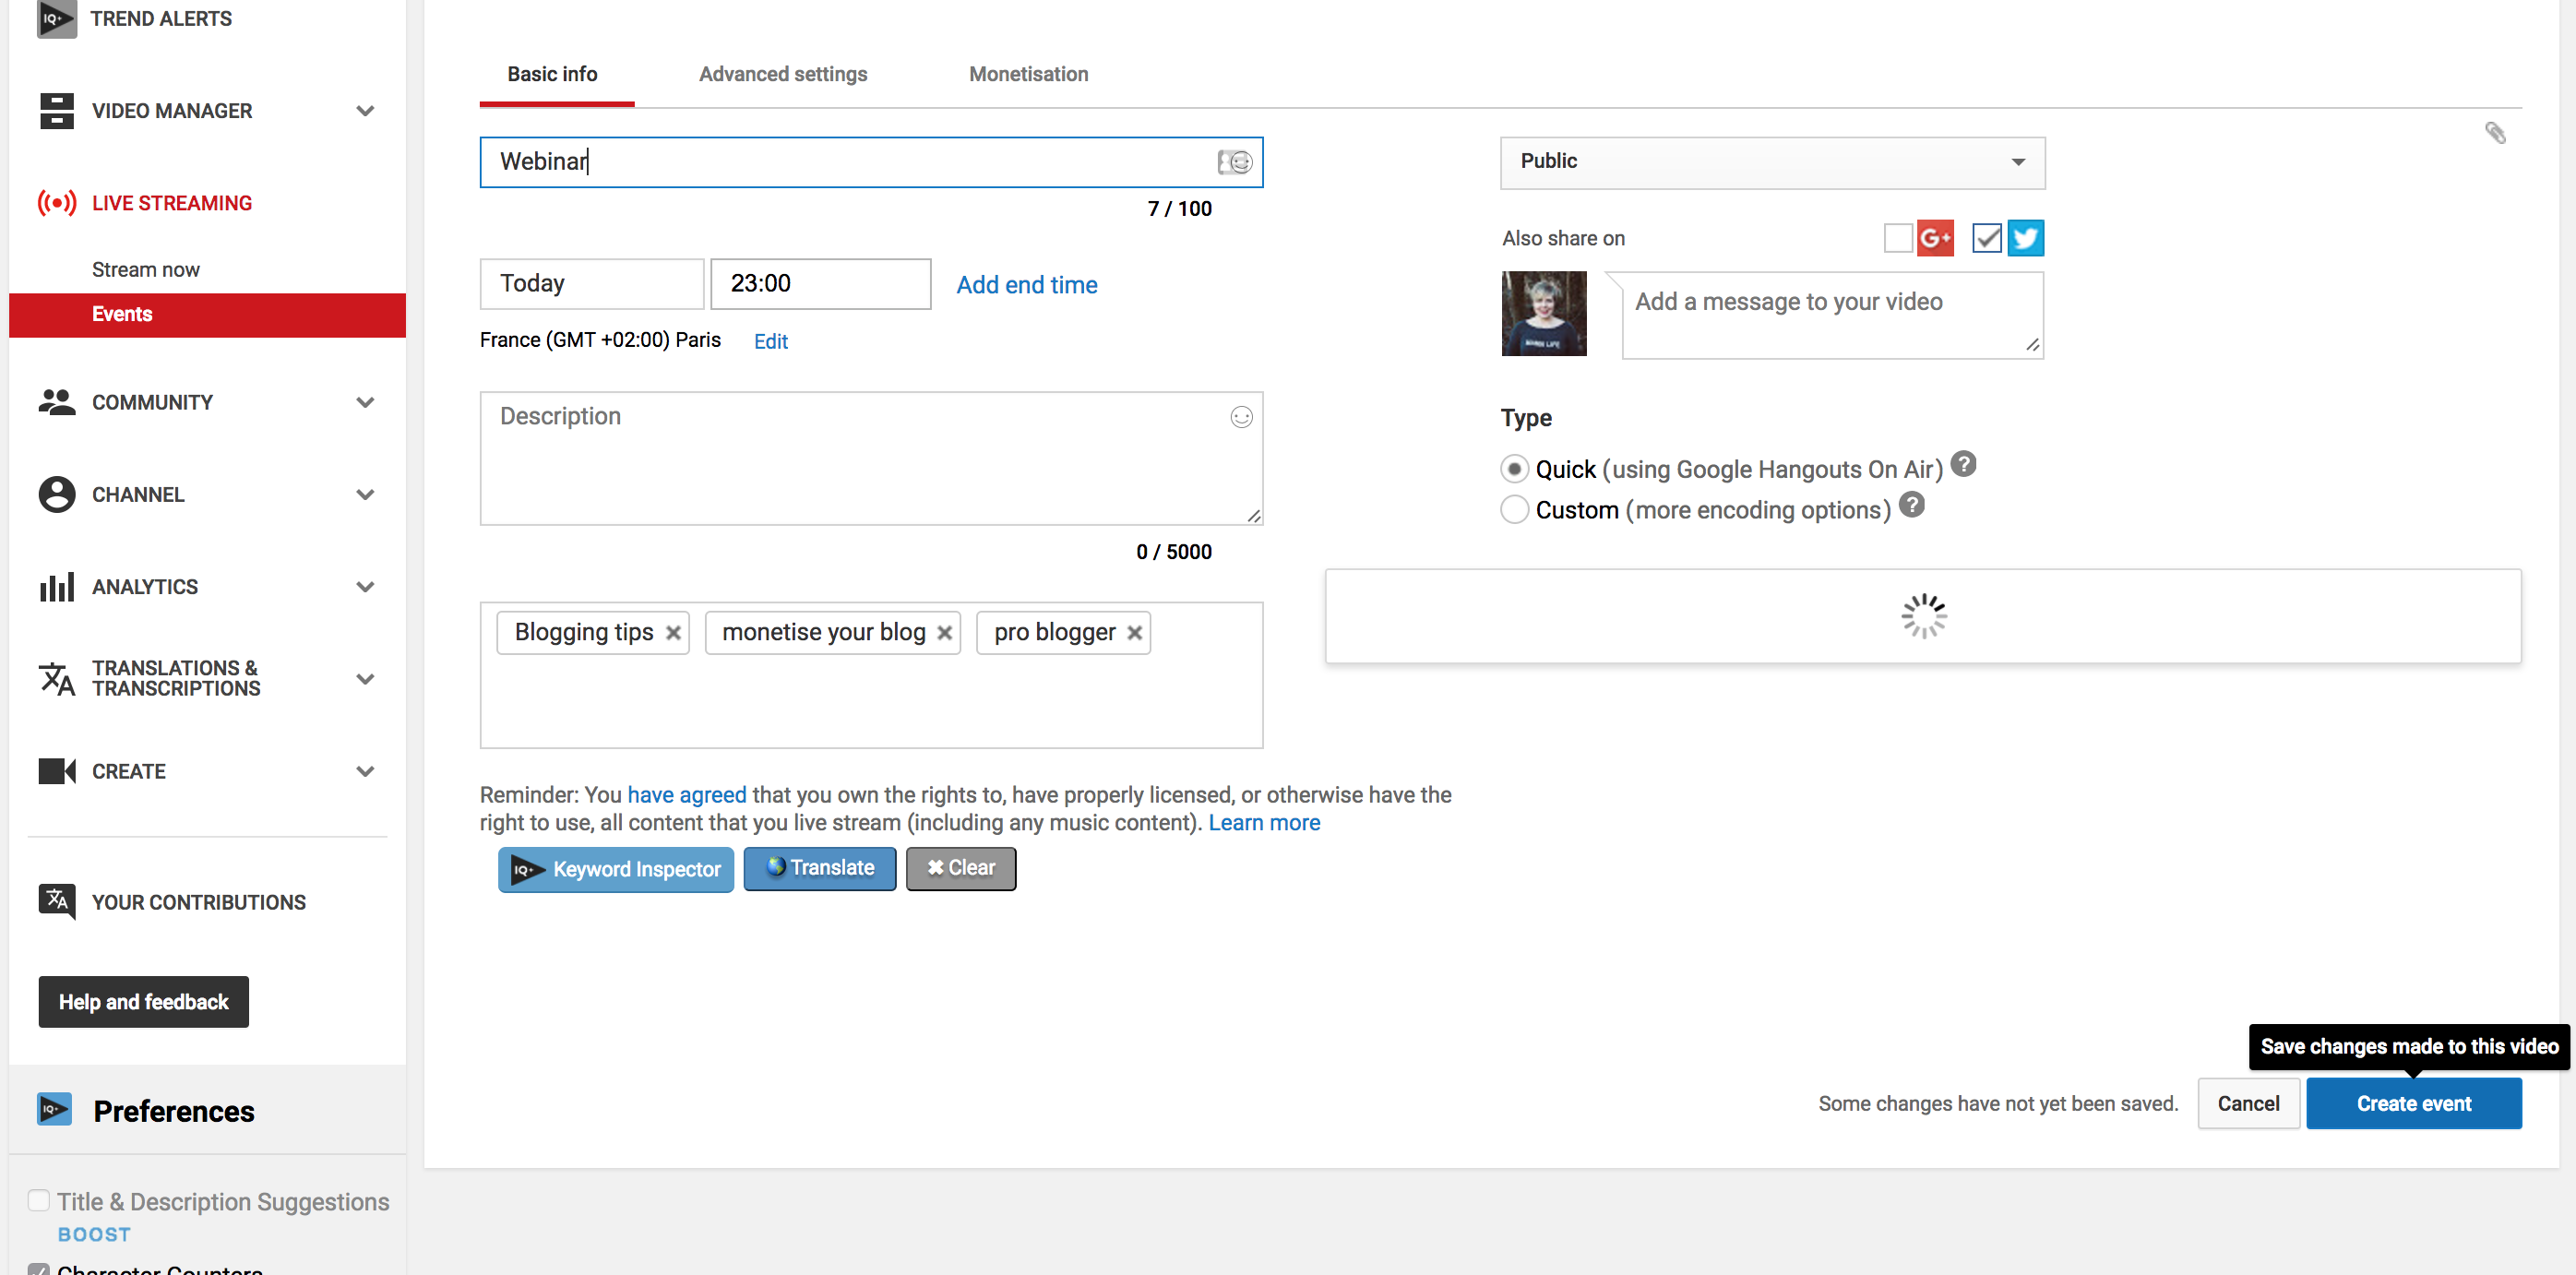
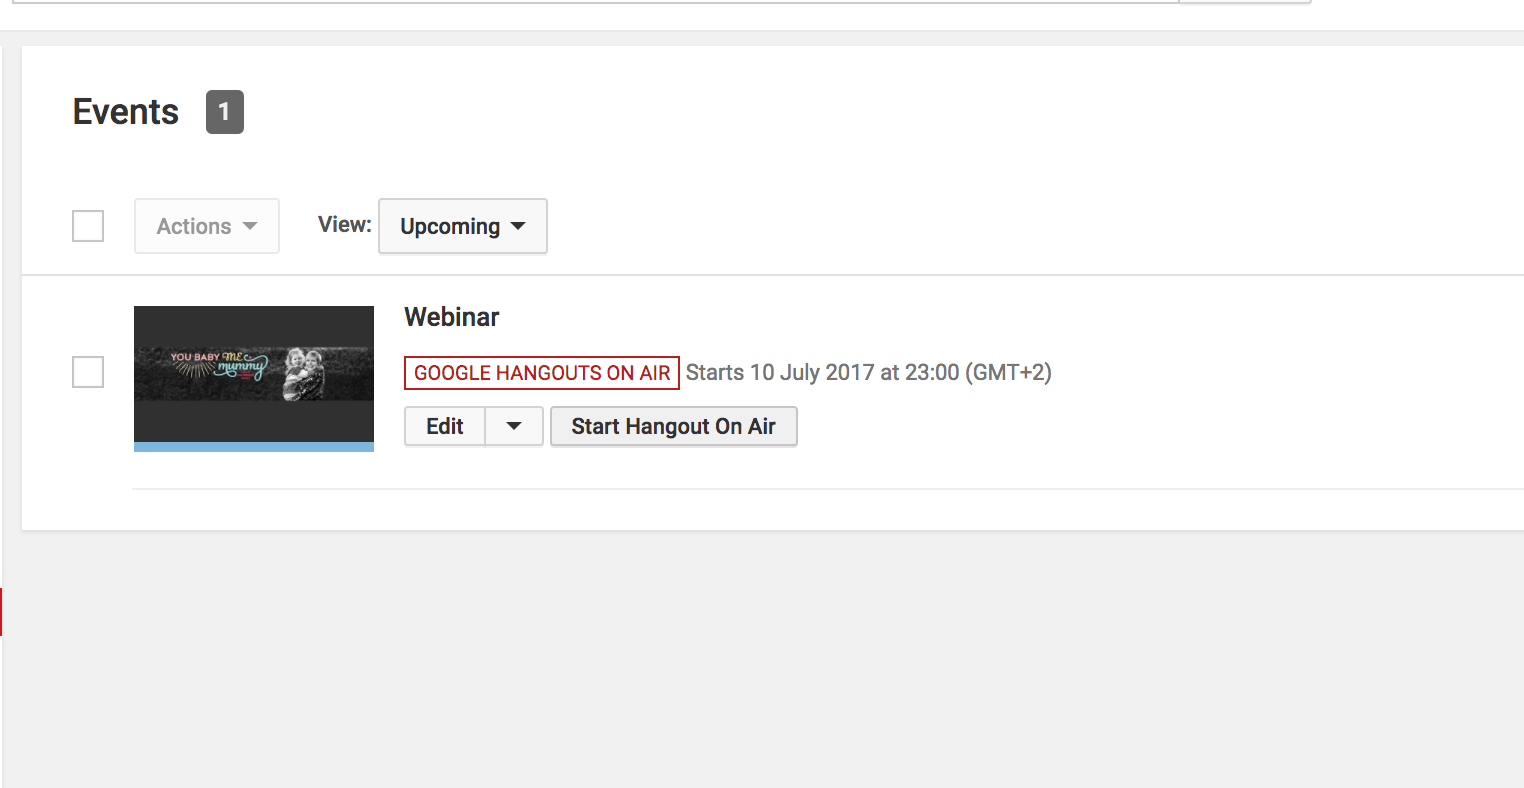
- This will then create the screen below. You now need to find the embed code. Click on Start Hangout On Air (Don’t worry it won’t actually start!).
- It will just bring up this page where you will appear on camera. Look in the bottom right corner of the screen and you will see ‘links’ click and then copy the Video Embed code.

- Paste this code into your WordPress page wherever you want the YouTube Live to appear.
Setting up the chat box
- Next, you need a chat box. I used Chatwing which offers a free service. Create an account, log in and then click Live Chatbox over on the top left.
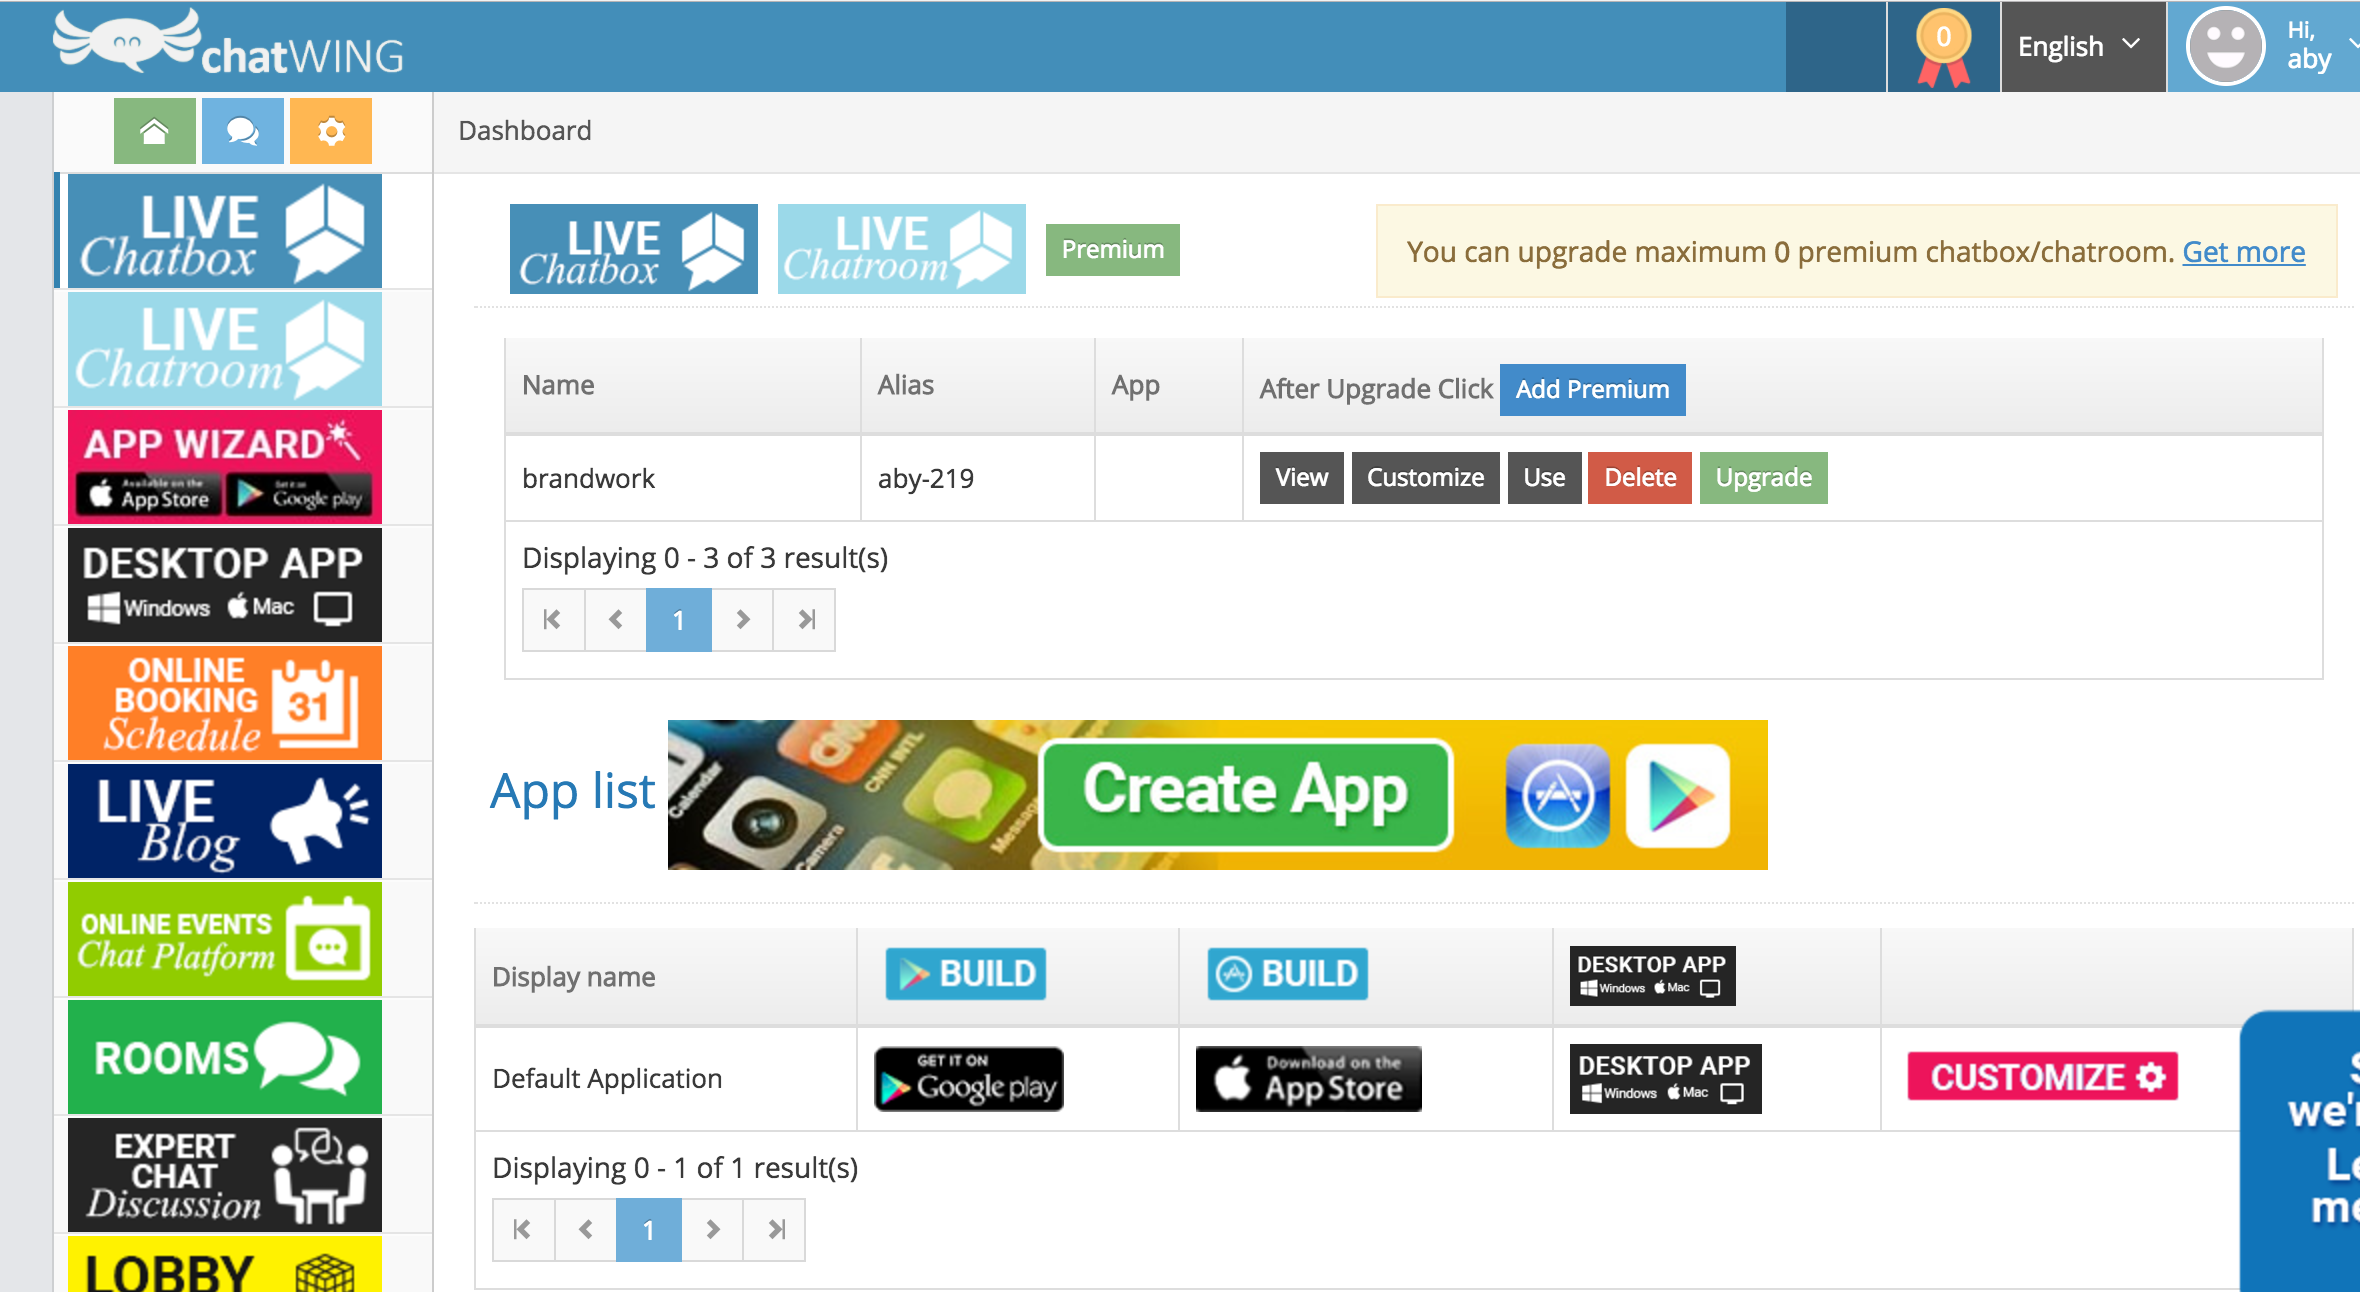
- Complete the basic information, Name and Description. Click colour and add in your own Hex code if you wish to personalise the chat box to fit with your branding.

- Then click Install Embed Interface and select Installation.

- The screen below will appear and you can adjust the height and width of your chat box by sliding the sliders. When you’re happy, save and the copy the iFrame code right at the bottom.

- This code needs to be pasted into your WordPress site where you want the chat box to appear. (I pasted mine into a box to the right of my webinar code).
How it will look
- When you save and preview the page, you will see the YouTube Live placeholder that you uploaded (or a selected thumbnail) and the empty chat box (note my chat box isn’t empty as my webinar had taken place when I grabbed this screen shot).
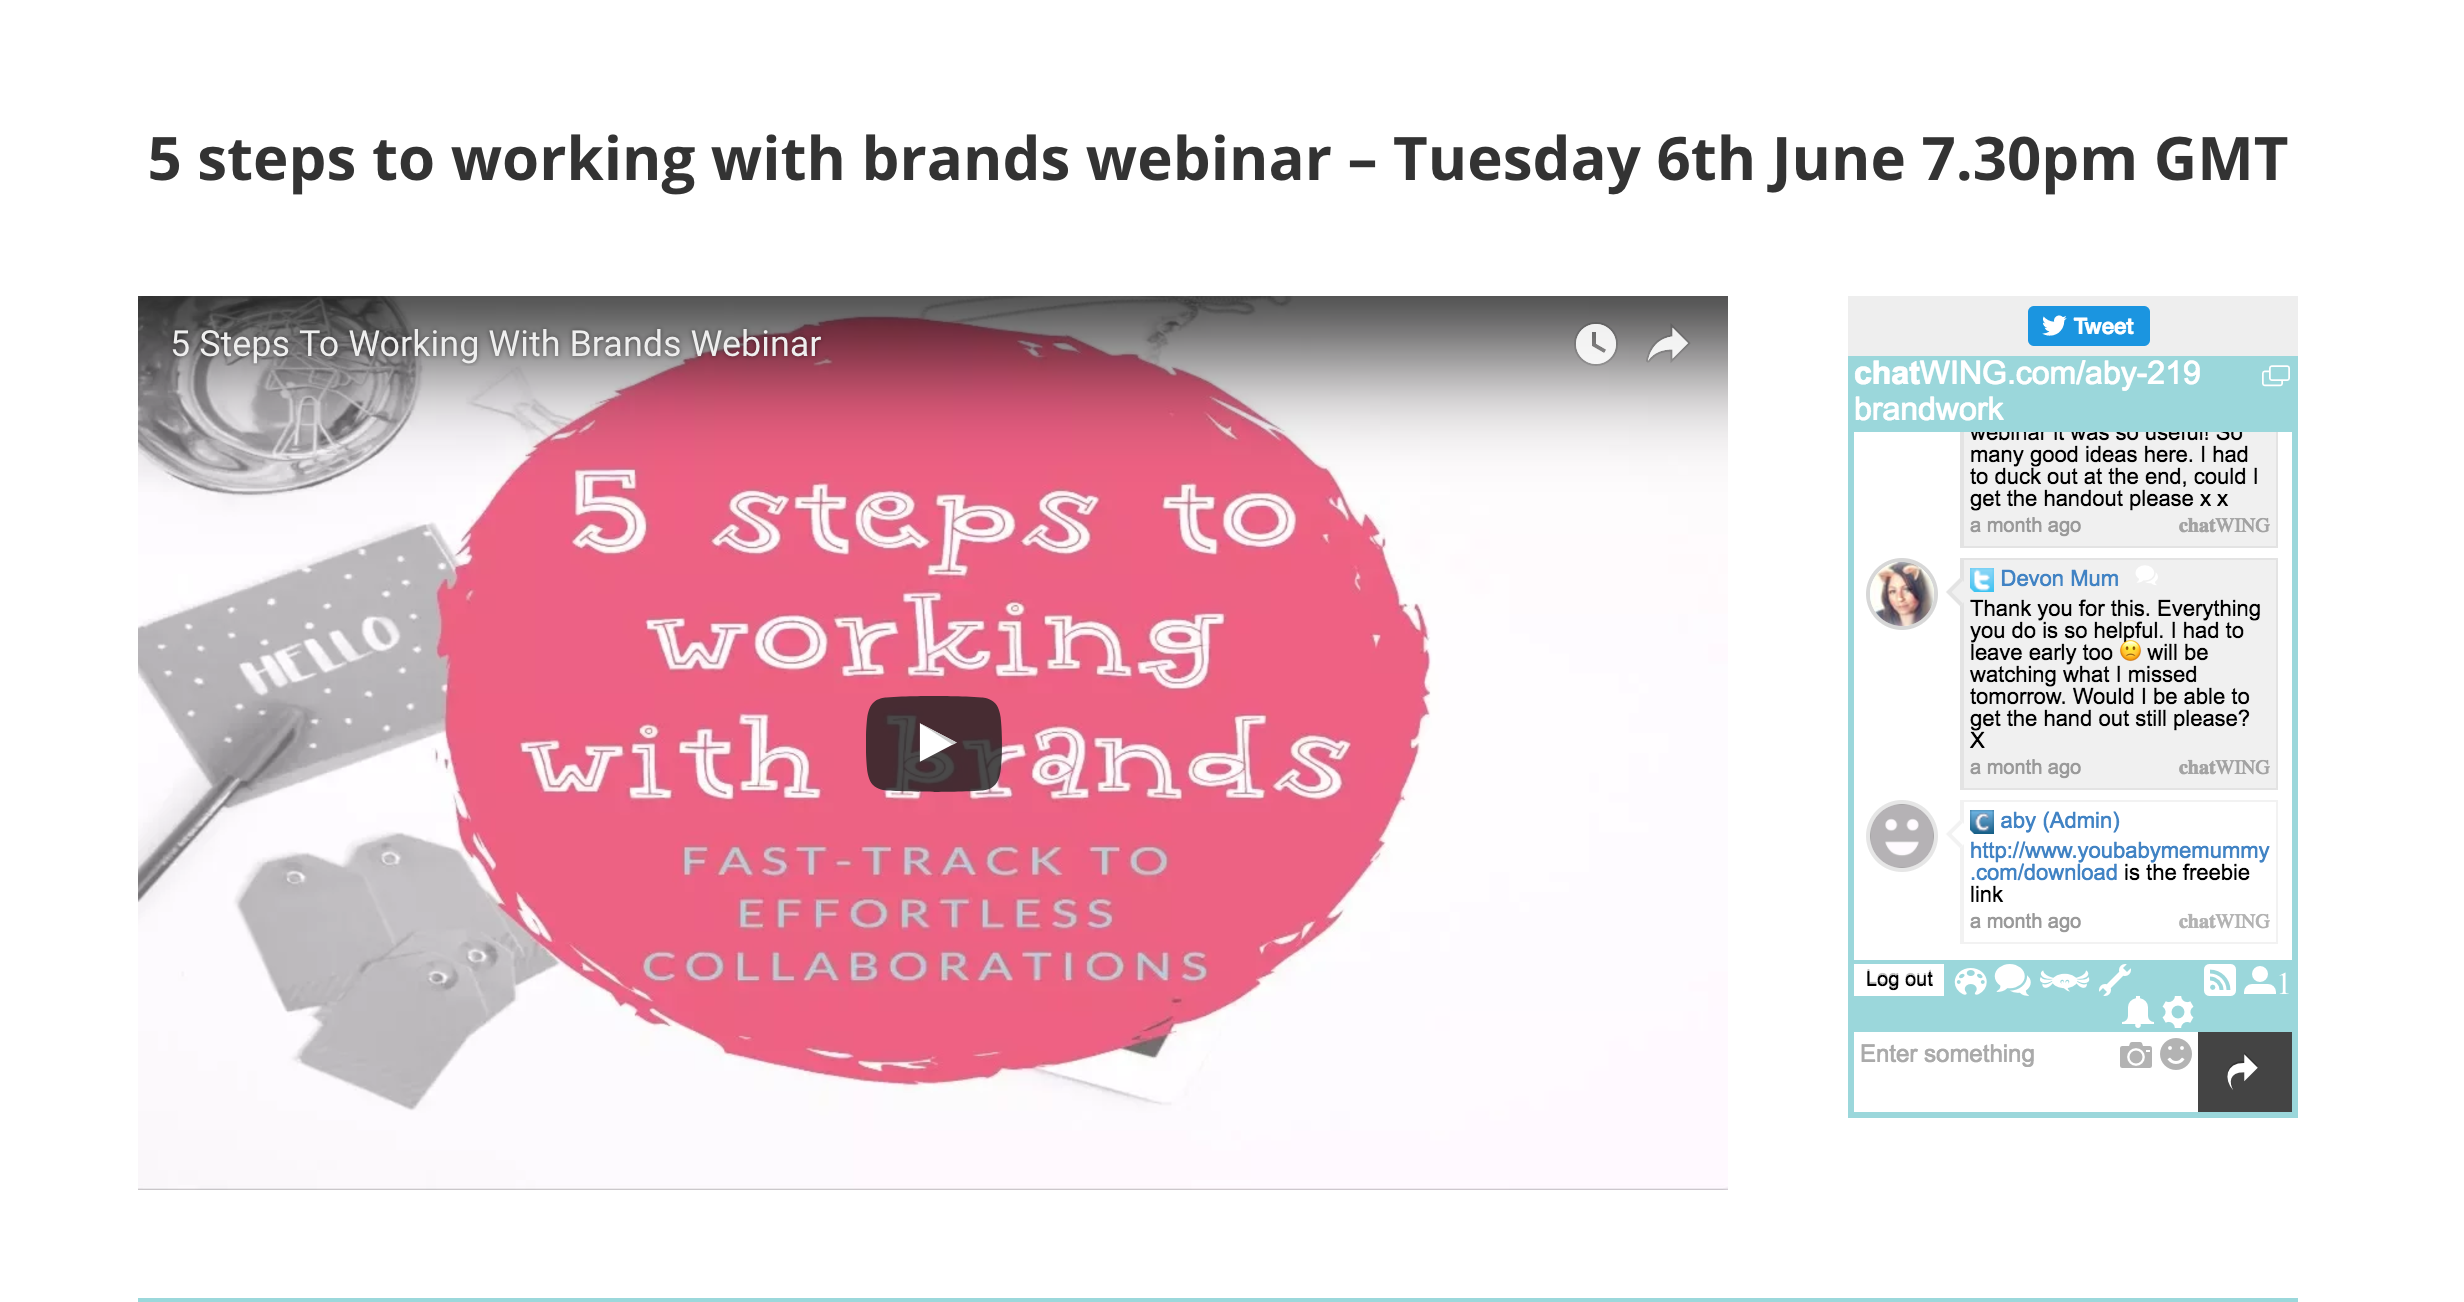
- You’re basically ready to roll. When it’s time to go live, you will be over on YouTube Live, but it’s a good idea to have another computer on this page of your blog. This way you can see the chat and make sure everything is behaving as it should be.
Time to go live!
- When it’s time for your webinar. Go to YouTube Live, click the start Google Hangout on Air and then you will see the screen you saw before, with yourself on the webcam.
- To share your screen click over on the left – Screenshare.

- Then you have the option of your entire screen or a particular application window.
- If you want to share your slide deck, then you need to have it open when you click Application Window and you will see it in your available options. Then just select your deck. Make sure the box on the bottom right of your screen which says ‘You’ in the middle it selected and showing a white edge around the box.

- When now the live broadcast will mirror your slide deck. NOTE you won’t be able to advance your slides by clicking them on the YouTube Live. So reposition your actual slide deck and place it over the deck you see on the YouTube Live. This way you’re seeing what viewers will see, but you can click to advance your slides.
If you want to watch my step by step video tutorial you can catch that below.
Why not print this tutorial out, so you can have it beside you when you’re setting this up yourself.
If you want to join my mailing list and get access to my epic Blogger’s Resource vault of cheatsheets and downloads (INCLUDING THIS PRINT OUT) as a welcome gift, you can do that here.
I hope this helps, let me know in the comments if you use this tutorial to get started with webinars. Oh and don’t forget to print this tutorial!
Comments 3
Did you put a link to this webinar somewhere (maybe I just missed it) ?
Author
My brand webinar? It’s not currently live at the moment but will be available again soon,
Loved this tutorial! Thanks for sharing, will keep it bookmarked for when (if!) I end up using webinars for my blog. Got to admit we use them at work and I find the software quite annoying!